
Cream yarn makes these pumpkins look soft and wintry. Orange-red brings out the lobes, and the brown versions sit happily beside either colour. This crochet pumpkin pattern has another detail worth a closer look: the little grooves take shape as you work around the body.
Choose a small pumpkin for a narrow shelf, a taller one for the middle of a display, or a pair with different textures. There are six labelled variants, A–F, built from the same pattern family. Each has its own printable guide below. For a pet-loving home, this is a way to add a handmade autumn corner while keeping the stuffed decorations out of curious paws’ reach.
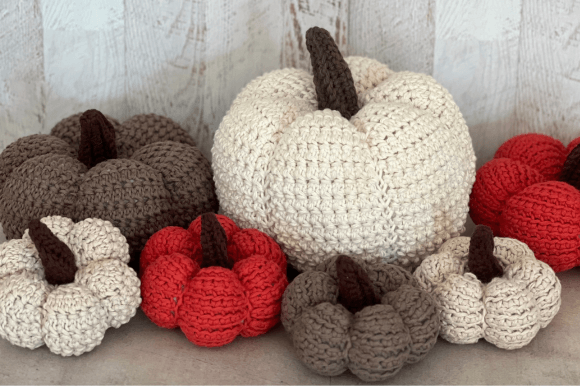
About this project: Intermediate crochet, written in US terms. These guides adapt the supplied pattern by Ouma Ralie, with original step photos and PetsCrochet formatting. This editorial edition has not been physically tested.
Choose your pumpkin
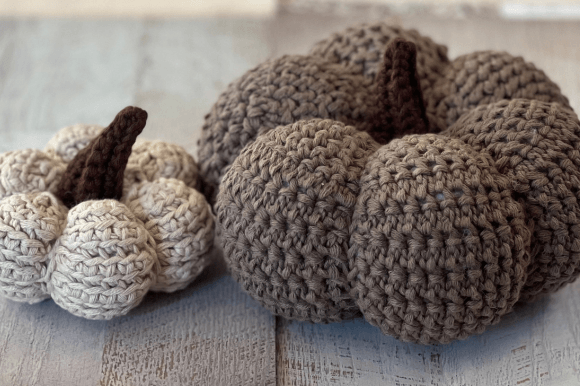
The small versions share one body shape. The larger ones widen the same six-lobe construction. B and E get their nubbly surface by turning the body inside out before stuffing, so the texture change does not require a new stitch pattern.
| Variant | Look | Body height × width | Body rounds |
|---|---|---|---|
| A | Little Ridged Pumpkin | 4 cm × 9 cm | 14 |
| B | Little Nubbly Pumpkin | 4.5 cm × 10 cm | 14 |
| C | Taller Small Pumpkin | 5.5 cm × 10.5 cm | 16 |
| D | Large Ridged Pumpkin | 6 cm × 13.5 cm | 22 |
| E | Large Nubbly Pumpkin | 7.5 cm × 15.5 cm | 22 |
| F | Tall Statement Pumpkin | 11.5 cm × 18.5 cm | 28 |
These are the source pattern’s approximate body measurements, excluding the stem. Yarn, tension, stuffing and centre shaping affect the final size.
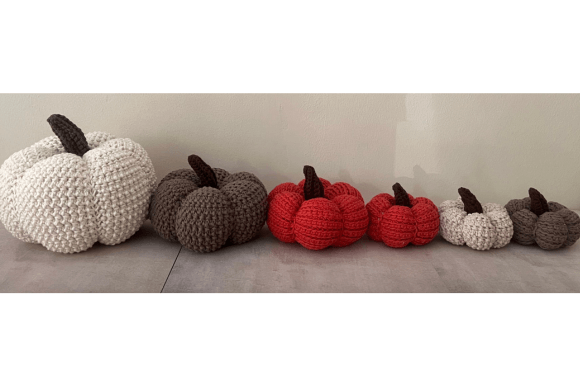
1. Little Ridged Pumpkin (Variant A)
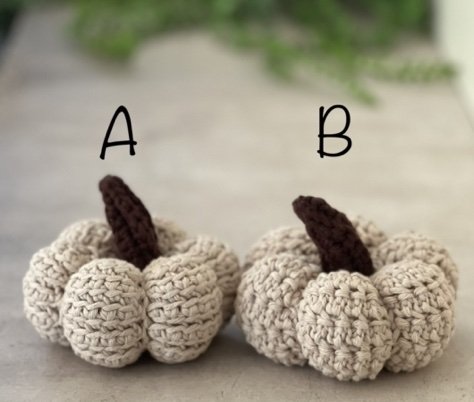
The smallest ridged version makes the stitch pattern easy to see. Narrow horizontal lines run across each rounded lobe, with a dark stem giving the little pumpkin a clear silhouette.
Try A at the front of a display, where a larger pumpkin will not hide it. Cream brings the ridges into focus; brown gives the same shape a quieter look. If you want a small crochet pumpkin but prefer a smooth rhythm to the surface, this is the place to start.
Making note: A uses 14 body rounds and the smaller stem. Watch the slip stitches between the lobes. They belong in the stitch count and are easy to overlook.
Variant A · 14 body rounds · complete instructions, stitch key and original step photos.
2. Little Nubbly Pumpkin (Variant B)
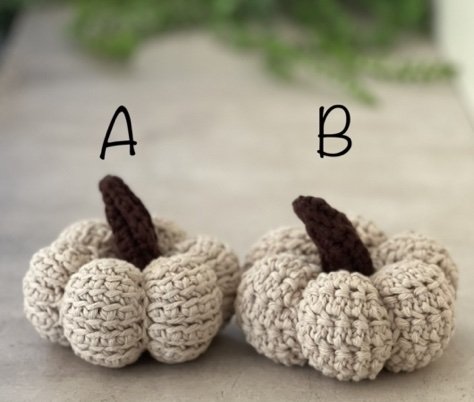
B is A with the other side of the fabric showing. The horizontal ridges become a pebbly, nubbly surface, and the source reports a slightly fuller finished shape.
A cream A-and-B pair is a useful comparison because the colour stays the same while the texture changes. Set them side by side on a shelf you can keep out of pets’ reach, or use one at either end of a larger arrangement.
Making note: Turn the body inside out before adding the stuffing. The B guide repeats the full schedule, so you do not need to jump between two PDFs.
Variant B · 14 body rounds · complete instructions, stitch key and original step photos.
3. Taller Small Pumpkin (Variant C)
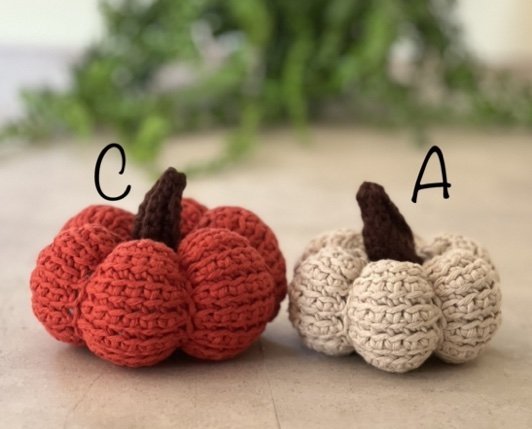
C keeps the small pumpkin’s ridges and adds two body rounds for extra height. In the labelled photo, the orange-red C sits beside a cream A, making that change easier to spot.
This is a useful middle piece when several mini pumpkins look too similar in height. Choose the same yarn colour as A for a gradual size change, or let an autumn orange-red C become the small bright spot in a neutral group.
Making note: The body stays at 42 stitches through rounds 5–11. Those two extra rounds come before the decreases. The stem remains the small version.
Variant C · 16 body rounds · complete instructions, stitch key and original step photos.
4. Large Ridged Pumpkin (Variant D)
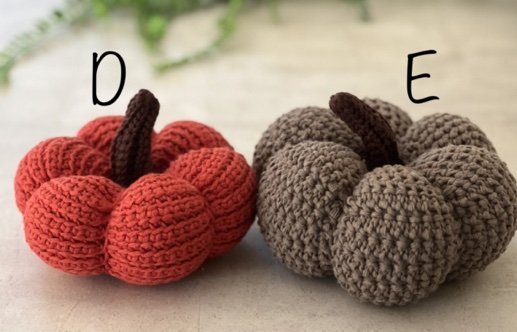
D gives the ridged finish a broader shape. Each lobe has more room to show the linked stitches, so it is a good choice when the texture is the detail you want people to notice.
Use D as the main pumpkin in a three-piece arrangement, with A and C alongside it. For a pet-photo backdrop, keep the display on a separate, inaccessible surface and photograph your pet in their usual resting spot. The pumpkin does not need to become something they wear or play with.
Making note: D grows to 66 stitches, then works seven rounds at that width before the top shaping starts. It uses the larger sewn stem.
Variant D · 22 body rounds · complete instructions, stitch key and original step photos.
5. Large Nubbly Pumpkin (Variant E)
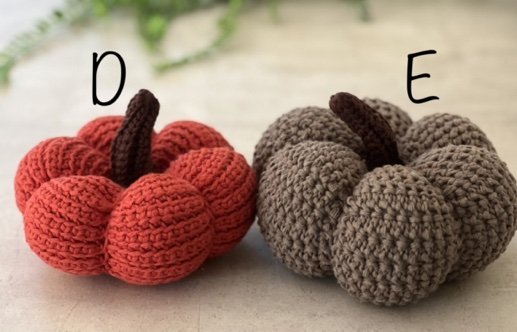
E has the large body with the nubbly side facing out. The brown example looks especially tactile, with a broad centre and deep gaps between the lobes.
Pair it with the ridged orange-red D if you want contrast without adding more objects to the display. Or keep everything cream and let the two surfaces do the work. The source reports a larger finished measurement for E even though D and E share the same body schedule.
Making note: Turn E inside out before stuffing. Check that all six grooves are still visible as you fill and shape it; extra stuffing should not pull the stitches into open gaps.
Variant E · 22 body rounds · complete instructions, stitch key and original step photos.
6. Tall Statement Pumpkin (Variant F)
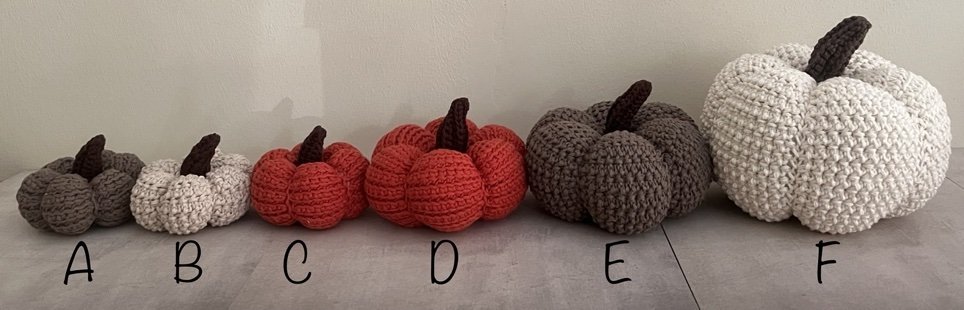
F is the tall pumpkin at the right of the labelled lineup. Its large cream shape gives the smaller pumpkins a backdrop, which is handy when you want a full-looking display without making many pieces.
It follows the large body construction with six additional straight rounds. The result depends partly on how firmly you stuff it and how far you draw the top and bottom together during finishing.
Making note: The source photograph shows a nubbly F, but the written F instructions do not explicitly say to turn it inside out. The guide preserves the written body schedule and identifies the reverse-side finish as an optional interpretation to match the photo.
Variant F · 28 body rounds · complete instructions, stitch key and original step photos.
How the lobes form as you crochet
The body is worked in continuous rounds. Linked double crochet builds the raised sections, while slip stitches sit between them. You still sew on a stem and draw the centre together at the end, but the six segments are already part of the crocheted body.
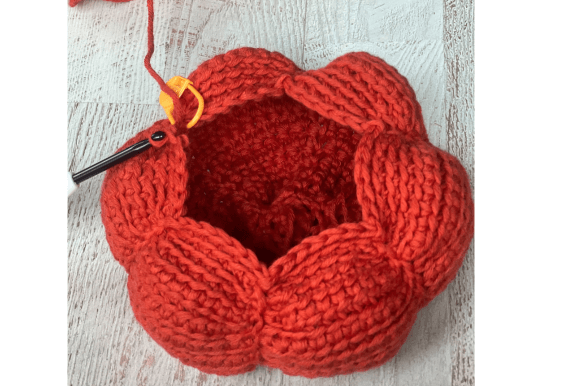
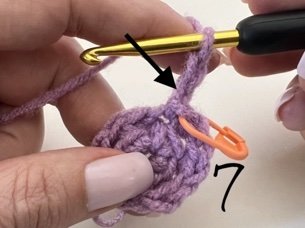
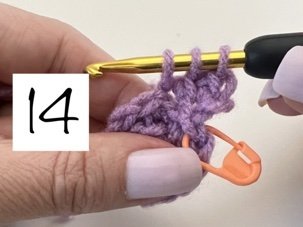
The first linked stitch in each section starts with two chains. Later stitches pick up the horizontal bar of the stitch you just made. Once you can find that bar consistently, it is much easier to follow the repeat. The printable guides explain both movements and keep the original numbered photos together.
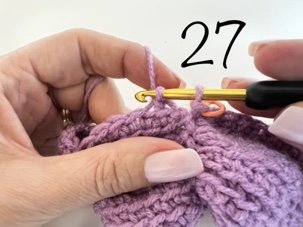
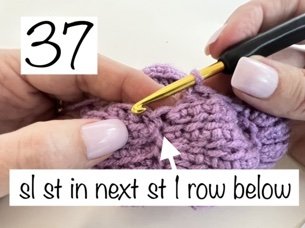
Count after the increase and decrease rounds. A missing slip stitch can make a whole lobe look wrong even when the taller stitches seem correct. The guides spell out the six repeats where the source shorthand leaves them implicit.
Yarn, hooks and the details to check first
The source uses worsted-weight cotton, a 4.5 mm hook for the body and a 4 mm hook for the stem. Its examples include cream, brown, orange-red and jute-coloured yarn. Choose a body colour you enjoy, then use brown for the stem if you want the same contrast as the photographs.
- Plan your yarn: the source allows one small skein for A, B or C, two for D or E, and three for F. These are purchasing allowances, not measured usage.
- Check the fabric: there is no verified crochet gauge for the project. Test the first four rounds and look for gaps against the stuffing before continuing.
- Choose texture early: B and E are turned inside out before filling. F’s photo-matching option is explained in its guide.
- Leave a sewing tail: you will need it to close and shape the centre, then secure the stem.
Make an autumn corner that fits a pet-loving home
Start with a place your pet cannot reach. A closed display cabinet may be more practical than an open shelf if your cat climbs or your dog picks up soft objects. Keep the pumpkins separate from beds, toy baskets and feeding areas.
Repeat a colour from your pet’s blanket or the room around their bed, then use the pumpkins elsewhere in the room. That gives the space a connection without adding dangling leaves, costume straps or loose decorations to the pattern.
Store your yarn, sewing needle and stitch markers away after each session, too. Swallowed yarn can cause a dangerous intestinal problem. VCA Animal Hospitals explains the risk from string and yarn. These pumpkins are decorative pieces and have not been tested as pet toys.
A few questions before you pick a colour
Is this crochet pumpkin pattern suitable for beginners?
The source rates it intermediate. It uses linked double crochet, back-loop decreases and slip stitches worked into the round below. If those are new to you, work the small A foundation slowly with the photo guide beside you.
Are these six different patterns?
They are six labelled variants in one pattern family. B changes A’s visible surface, C adds height to A, E changes D’s visible surface, and F adds height to D. Each download stands alone so you can print only the version you want.
Can I use chunky yarn?
You can experiment, but these sizes and hook choices come from a worsted-cotton pattern. Chunky yarn will change the scale, fabric and amount of filling. Make a sample and record your result instead of expecting the listed measurements.
Can I wash the finished pumpkin?
Check both the yarn and stuffing labels. Test colourfastness and try spot-cleaning first. The assembled pumpkins in this editorial edition have not been wash-tested, and they should be fully dry before you store them.
Which one should I make first?
Choose A to learn the smaller body with the ridged side out. Choose B if the nubbly finish is what caught your eye. The A-and-B comparison makes it easy to decide before you commit to a larger version.
Save your favourite combination. A small cream pair, a single brown E or a larger F with two little pumpkins can each make a complete display. Pick the variant above and keep its PDF beside your yarn.
Pattern and original PDF photography: Ouma Ralie, September 2023. Article and editorial layout: PetsCrochet. Supplied promotional images are credited as source material; this edition does not claim a newly invented pattern.