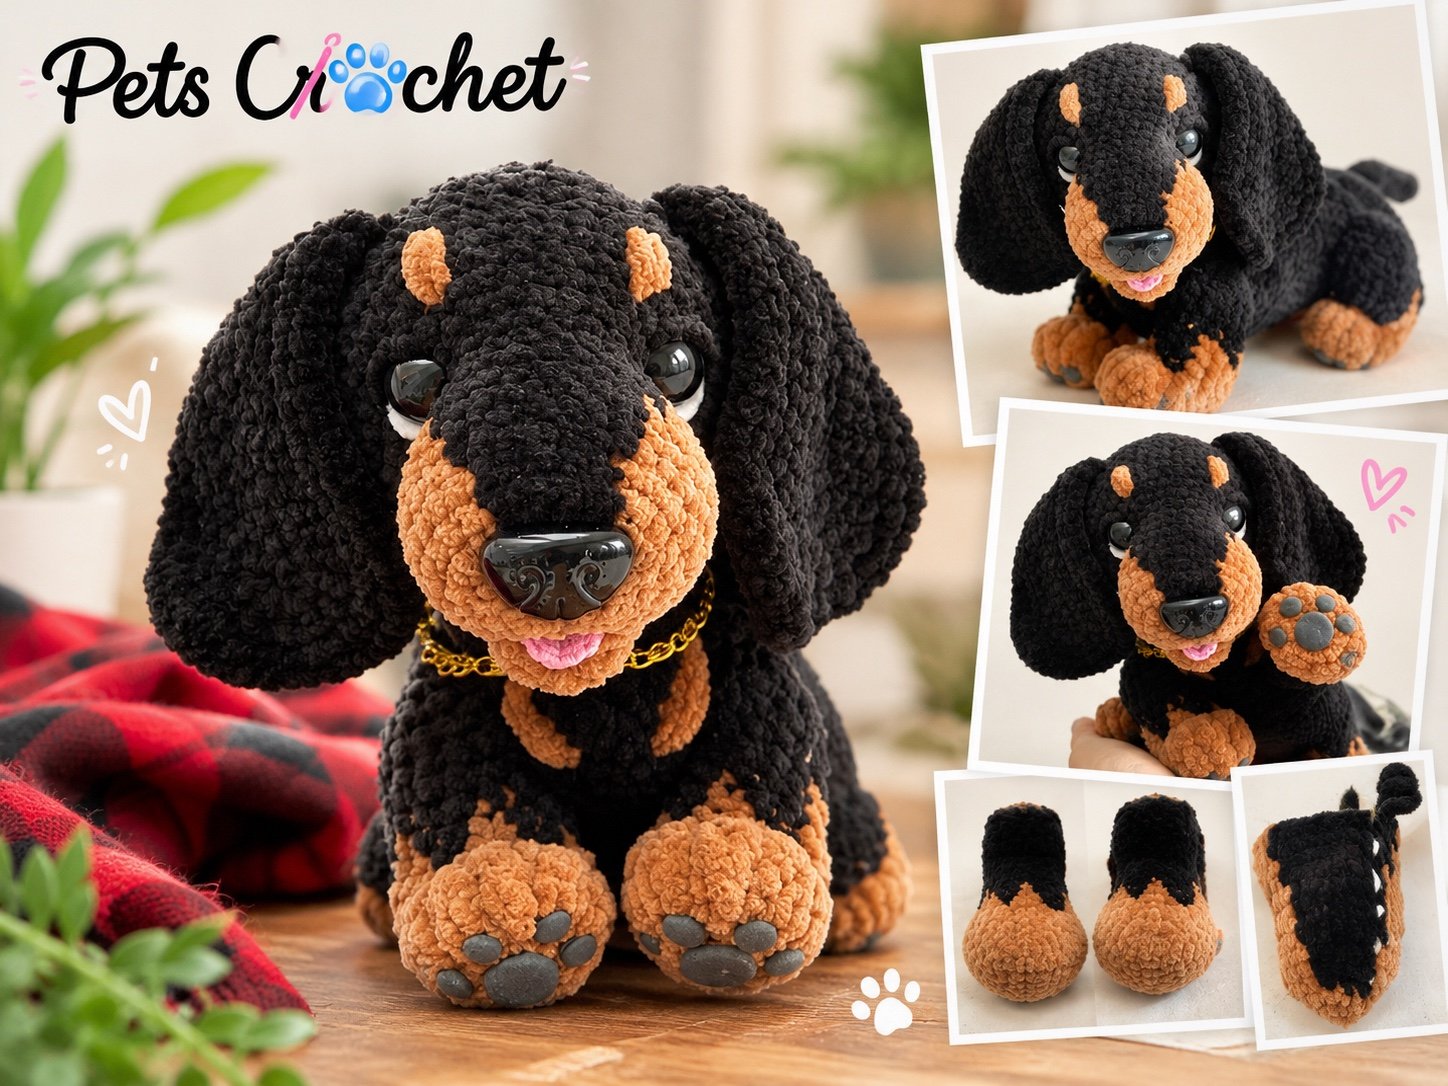
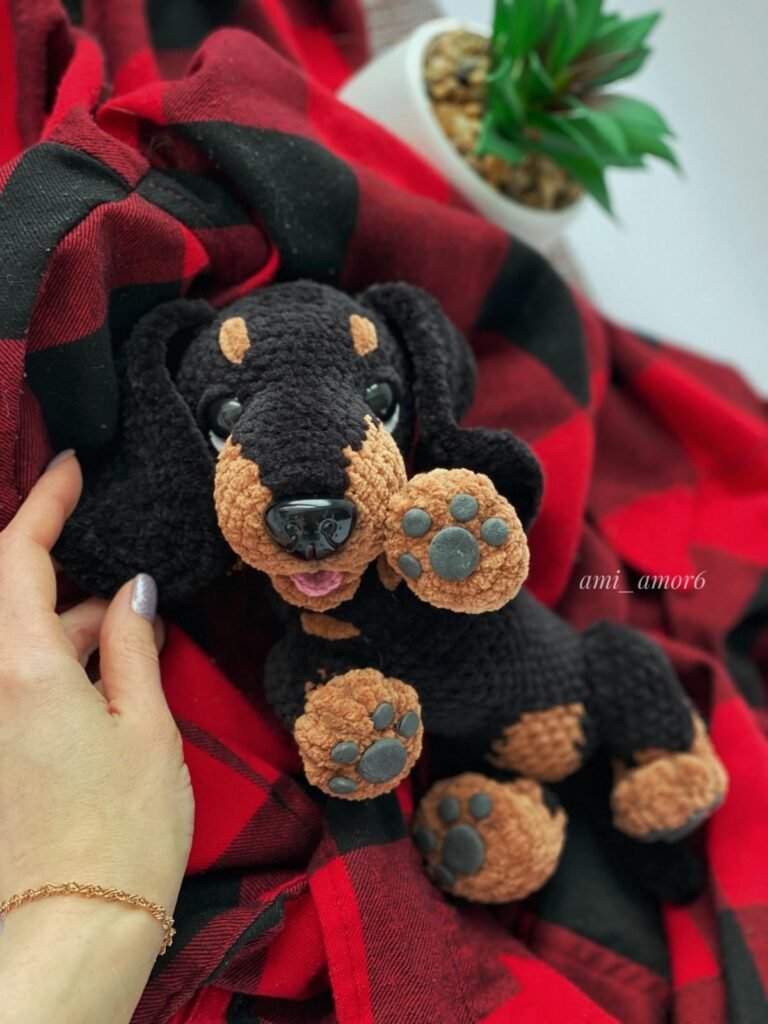
The floppy ears do a lot of the work in this dachshund crochet pattern. They frame a tan muzzle, small eyebrows and a pink tongue, while the long black body and short, rounded paws give the little dog its familiar shape. Plush yarn softens the whole outline.
This is one dog design with a free PDF guide and making photos. The main pieces use familiar amigurumi stitches, but the colour changes, joints and face shaping ask for care. Choose it when you want a dog keepsake with plenty of character and you enjoy the finishing as much as the crochet.
1. Black-and-Tan Plush Dachshund
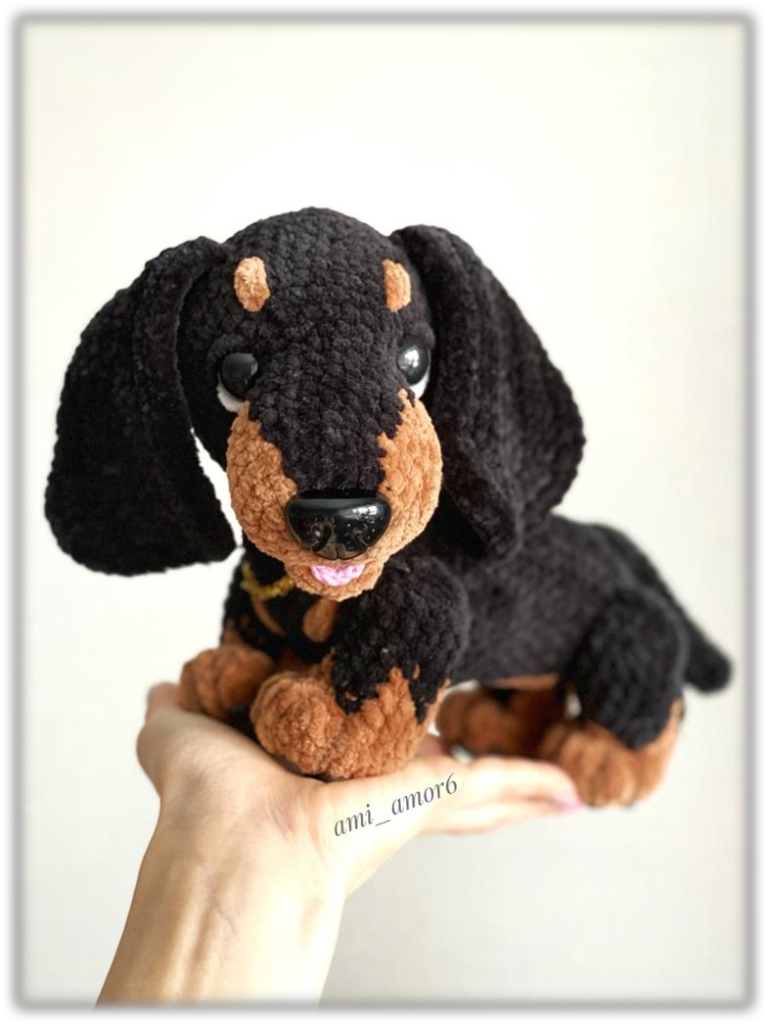
The tan areas are worked into the muzzle, paws and belly. Black ears hang beside the face, and short stitches shape the eyelids and eyebrows. Those small changes in placement can make the finished dog look quite different, so it helps to pause and check the face from the front before securing the details.
The reference size is about 18 x 15 cm, roughly 7.1 x 5.9 inches. Your finished size will depend on yarn, hook and tension. The guide includes the complete making route, colour-change notes and assembly references. Added clarifications are marked as untested.
What you need for this crochet dachshund
| Part of the project | Materials to plan |
|---|---|
| Main dog | Himalaya Dolphin Baby chenille, 100 g/120 m: about half a brown skein and one black skein as the listed allowance; 3.5 mm hook. |
| Pink tongue | A small amount of YarnArt Jeans and a smaller hook. The guide explains the two listed hook sizes. |
| Face and joints | Eyes, nose and toy joints sized to the actual crocheted parts; sculpting thread and a suitable needle. |
| Filling and finishing | Polyfill, stitch markers, sewing yarn or strong thread, and scissors. Paw pads are optional. |
Plush yarn can hide the tops of stitches. A running marker helps you follow the rounds, especially on the black body. Count before changing colour or closing a part, when it is still straightforward to undo a round.
The pictured dog uses hard eyes, a nose, internal joints and optional glued paw pads. Plan those details before you start. This is a decorative amigurumi project for a dog lover, with small components and filling that should stay away from real pets.
How the dachshund takes shape
Start with the two-colour muzzle
The head begins at the nose end in brown, then adds black while the muzzle is still narrow. The coloured sections change width over several rounds. Keep the unused yarn relaxed inside the piece so the colourwork does not pull the muzzle out of shape.
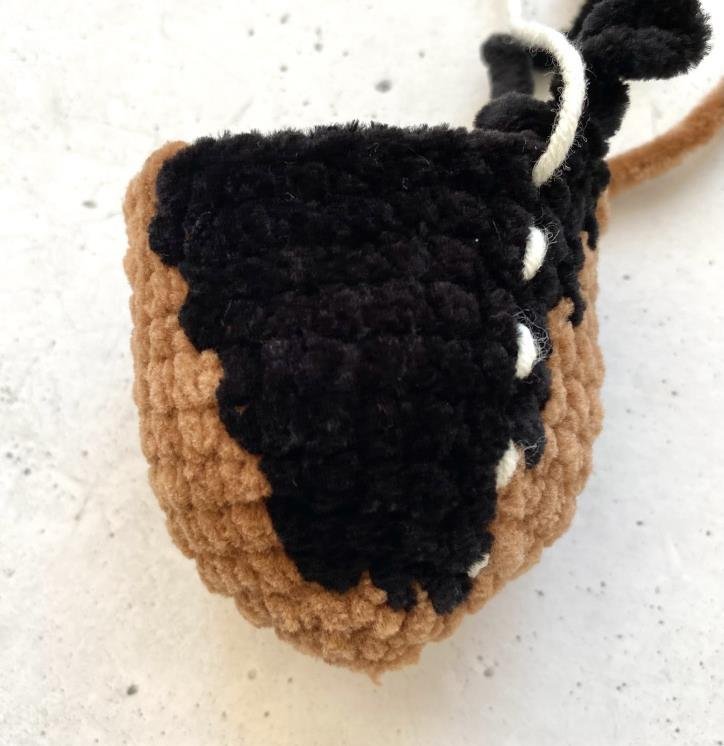
Change colour on the final pull-through of the stitch before the new colour begins. The guide names the colours in words so you can follow the tan and black sections without relying only on coloured print. Stop to check the nose and eye positions before the head closes.
Make the paws as matching pairs
The front and back legs have different shaping. Half double and double crochet stitches round out the paws before the work narrows toward the leg. The black-and-tan transitions make the tops of the paws look slightly jagged rather than forming one straight stripe.
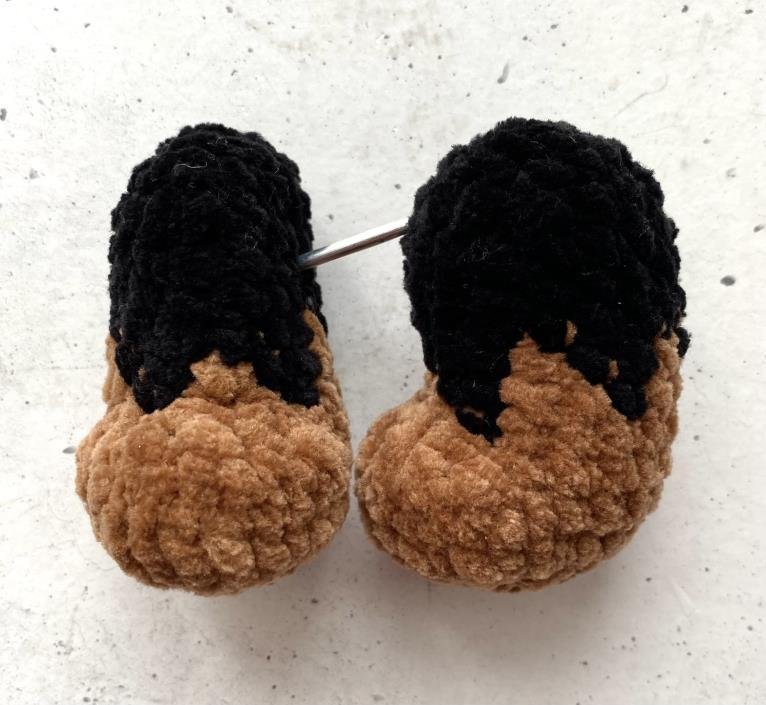
Make the second front leg while the first is beside you, then do the same with the back pair. Compare their height, toe direction and filling before fitting the joints. A matching stitch count helps, but the amount of filling also affects their shape.
Keep the long body aligned
The body starts in black and develops the tan belly farther along. Its marker follows the middle of the back, while the decreases sit underneath. That distinction matters: a shifted marker can move the belly patch or make the legs sit unevenly.
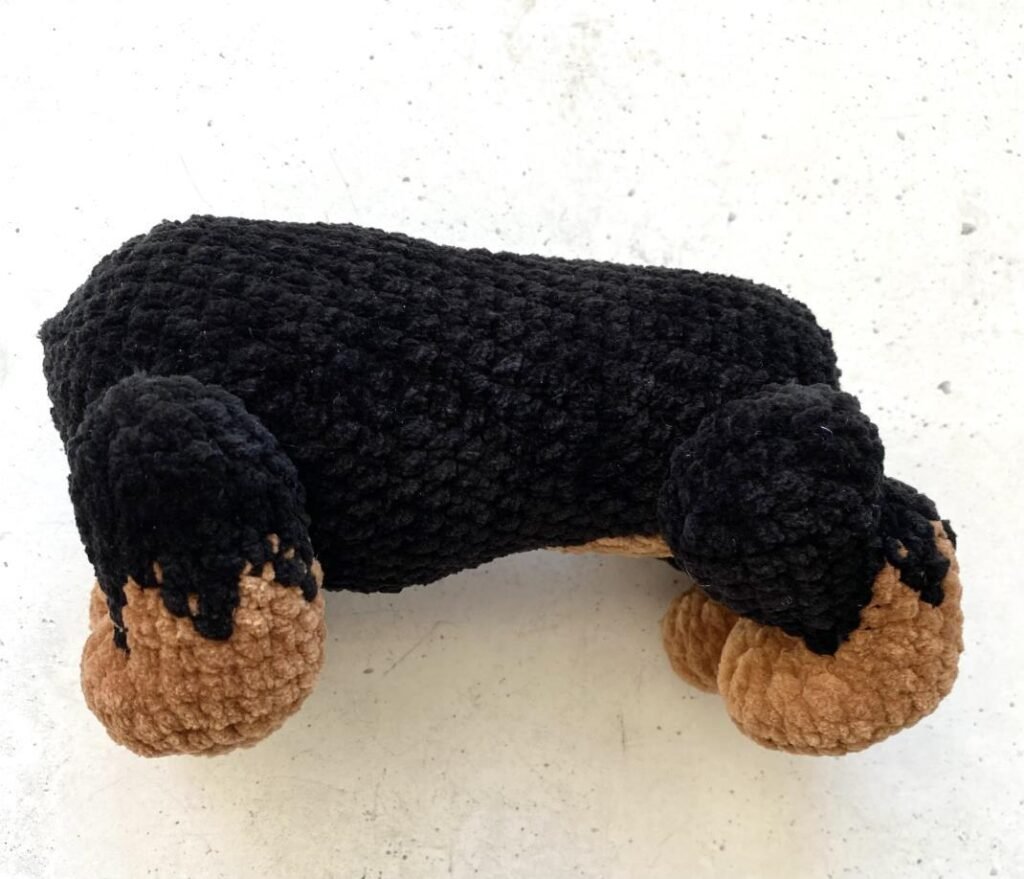
Check the leg positions from the front, side and underside. Once the head is in place, it becomes harder to reach some of those joins. Use the assembly photos to compare the parts, then remove every temporary pin before displaying the dog.
Give the face time
The mouth uses a brown plush layer and a smaller-scale pink tongue. The layers do not have the same stitch count, so centre them by shape instead of trying to match every stitch around their edges. Sew them with a few secure stitches before attaching the curved mouth below the muzzle.
Short eye-outline stitches and tan eyebrows finish the expression. Try the eyebrows with temporary placement first. Move both together if needed, then check the face at a little distance rather than only from directly above your work.
Size and care notes
Measure the completed dog from nose to rump and from the surface to the top of the head, then record both figures. The reference gives an approximate two-dimensional size; it is not a fit chart. A smaller hook can make a denser fabric, but it also changes the size and the space available for joints.
If you change yarn, make a small trial piece first and check that stuffing stays inside. Confirm that the eyes, nose and joint discs suit the actual fabric and openings. Keep a note of the yarn and hook used so the paired pieces stay consistent.
Choose cleaning methods for the whole object, including its filling, glue and fittings. A yarn label alone cannot establish how an assembled jointed figure will wash. Try the intended care on a spare swatch and check the component instructions before cleaning the finished dog.
Questions before starting
Is this a first crochet project?
It is better suited to someone who already understands magic rings, increases, decreases and working in rounds. The two-colour sections, shaped paws, joints and sculpting add work beyond a simple stuffed shape.
Is it a no-sew dachshund pattern?
No. The ears, mouth, neck and tail need attachment, and the joints require careful positioning. The photos help you see the assembly, but you should expect a finishing stage.
Can I use another plush yarn?
You can trial another yarn with a similar character, but the result needs a new size and fitting check. Keep the full stitch schedule while sampling; changing only the yarn does not guarantee that the same hard fittings will fit.
Do I need the paw pads?
No. They are a finishing option. The guide also describes an untested embroidered-pad alternative. That changes the pictured finish and still needs checking on a sample.
What is in the free PDF?
The download brings together the full making route, colour changes, materials, assembly notes and the supplied photo pages. It also explains the tongue-hook discrepancy and the proposed finishing clarifications.