

A shaped centre, textured ridges and a tiny picot edge give this crochet dog bow tie more detail than a plain folded rectangle. Wow Bow slides onto an existing collar through a crocheted strap, so the decoration stays separate from the collar itself.
1. Wow Bow: A Textured Collar Bow

The green sample has broad wings and a cinched-looking centre, but it begins as one shaped panel. A few decreases narrow the middle rows; increases bring the panel back to its full width. The folds and sewing finish the shape.
The edging does more than outline the bow
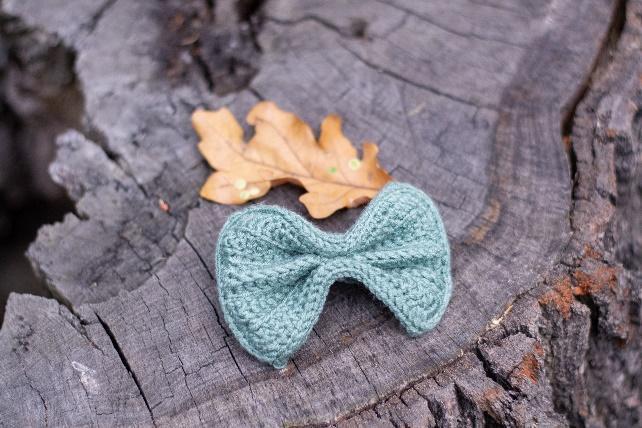
Two edging rounds give the piece a defined border. The first mixes stitch heights around the long and short sides. The second uses back-post single crochet, with a picot at each corner. Those details make this a more involved project than a first rectangle bow.
The prepared guide writes out the panel and perimeter counts and identifies a proposed clarification for the final edging join. It has not been independently crocheted or washed, so start with a sample rather than relying on the photo for your finished dimensions.
A strap fits the actual collar

The strap starts around five centre posts on the back of the bow. Its row count can change to suit the collar’s width and thickness. Check that passage off the dog first: it needs to slide on and off without pulling tight or leaving a loose hanging loop.
Keep the collar buckle, adjustment, tags, ring and release mechanism clear. The bow is decoration, not a collar, lead attachment or restraint. If it cannot sit clear of the hardware, use a different arrangement.
Two sewing paths shape the centre

After attaching the strap, fold the panel so the centre line and outer edges form the bow’s layers. The red and blue paths in the reference show where the shaping stitches go. Keep the collar passage open while you sew.
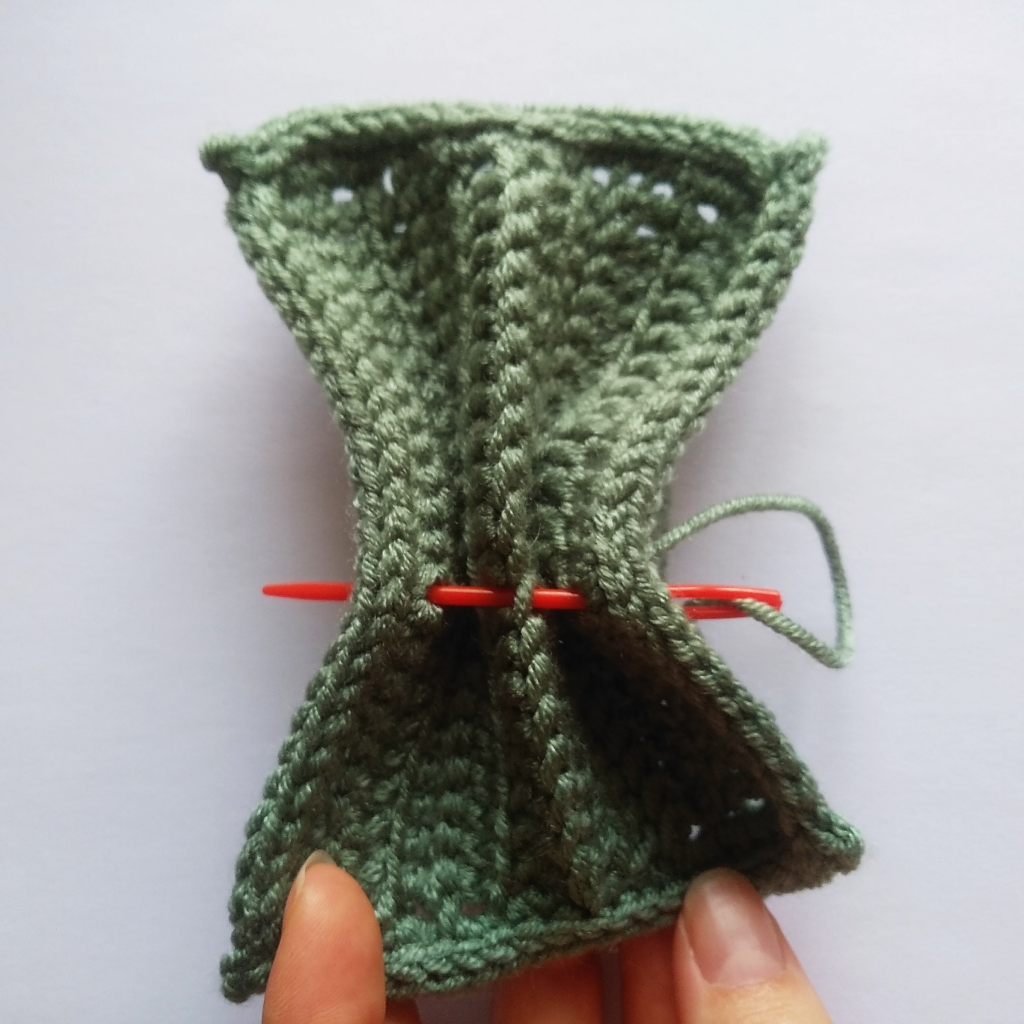
Spread the wings gently once the ends are secured. Check both sides for a loose fold, a lifted picot or an exposed tail. The guide keeps the actual assembly photos alongside the written steps rather than treating finished views as extra patterns.
Yarn, gauge and size
The reference uses Kind Feather acrylic yarn with a 3 mm hook. Its stated gauge is 20 double crochets and 10 rows over 10 cm, with a one-size bow measuring approximately 9 by 12 cm. Your edging tension, pleats and yarn choice can change the result.
The source estimates 10–15 g of yarn. That is a useful reference for planning, not measured consumption for the prepared guide. Its one-hour making claim is not repeated as a promise. Allow time to sample the stitches and fit the strap.
Finish for comfort and easy removal
Use the bow only when appropriate for the individual dog. It should stay clear of the throat and moving hardware, and come off if it shifts, catches, attracts chewing or causes distress. Check the strap and shaping seams before use, and keep any considered wear supervised.
Follow the actual yarn’s care label and test a separate sample before cleaning the whole bow. No washability, drying-speed or shape-retention result has been verified for this guide.
Questions before making it
Do I need a bought clip?
No. The pattern uses a crocheted collar passage, not a purchased bow clip.
Are the wings separate pieces?
No. One shaped panel is edged, fitted with a strap and folded into the finished bow.
Does one strap length fit every collar?
No. Sample it around the actual collar and keep all functional hardware clear.
Is the free PDF complete?
Yes. It covers all eight panel rows, both edging rounds, the strap and both shaping seams, with the supplied assembly references and untested join clarification.