

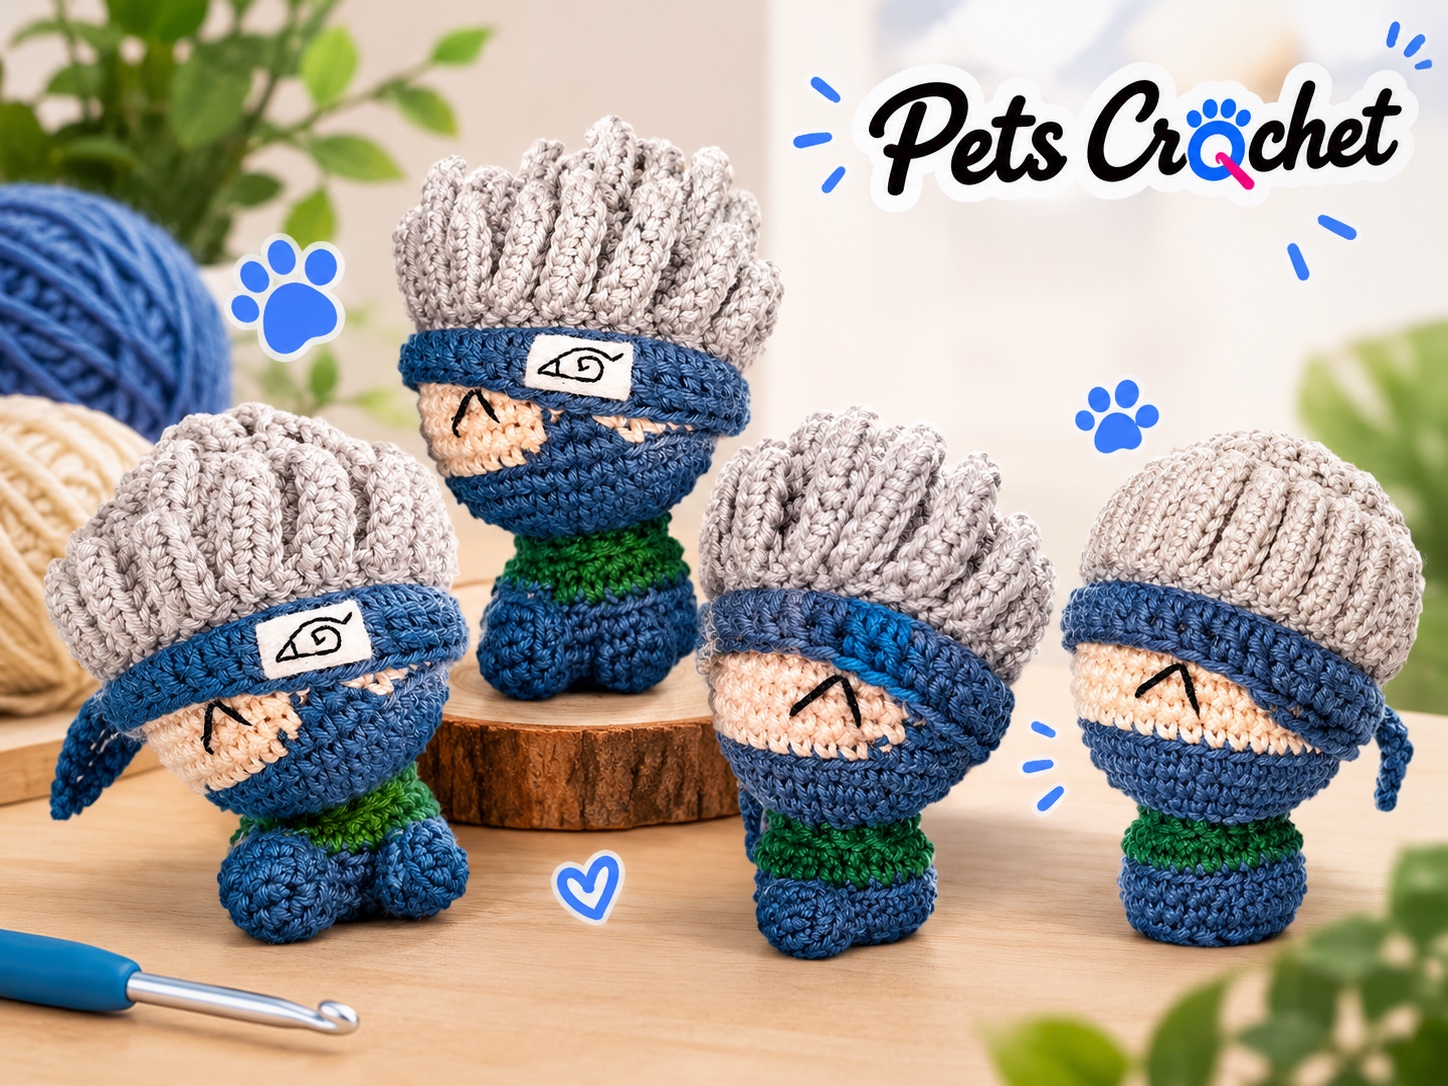
The grey hair does most of the talking in this mini Kakashi crochet pattern. Layered spikes sit above a blue headband, while a tiny embroidered eye and face mask keep the expression recognisable. A little green torso and two blue feet complete the seated figure.
This is Kakashi from Naruto, made as one small display amigurumi. The free PDF includes an English making route, the body and head shaping, separate limbs, the layered hair cap, headband and felt embroidery, with genuine construction photos to help you follow the details.
1. Mini Kakashi Amigurumi

The compact shape leaves room for the details that matter. The mask is worked through colour changes in the head, rather than added as a loose face covering. The hair is a separate cap with rows of chain-based tufts, and the headband carries a little white felt plate.
The original sample is about 8 cm tall with a 2.5 mm hook. Your yarn and tension will affect that result, so treat it as a reference size. This is an intermediate make: the stitches are familiar, but the reserved loops, small colour changes and hair layers need careful counting.
One character, with separate finishing pieces
The body and head continue from one another, but the legs, arms, hair and headband are made separately. That gives you a chance to check their positions before sewing. It is a project for someone who enjoys the finishing stage as much as the rounds.
Start with the body and mask colours
The figure begins at the blue base, moves into green for the small torso and neck edge, then returns to blue as the head expands. Beige stitches build the exposed face above the mask.
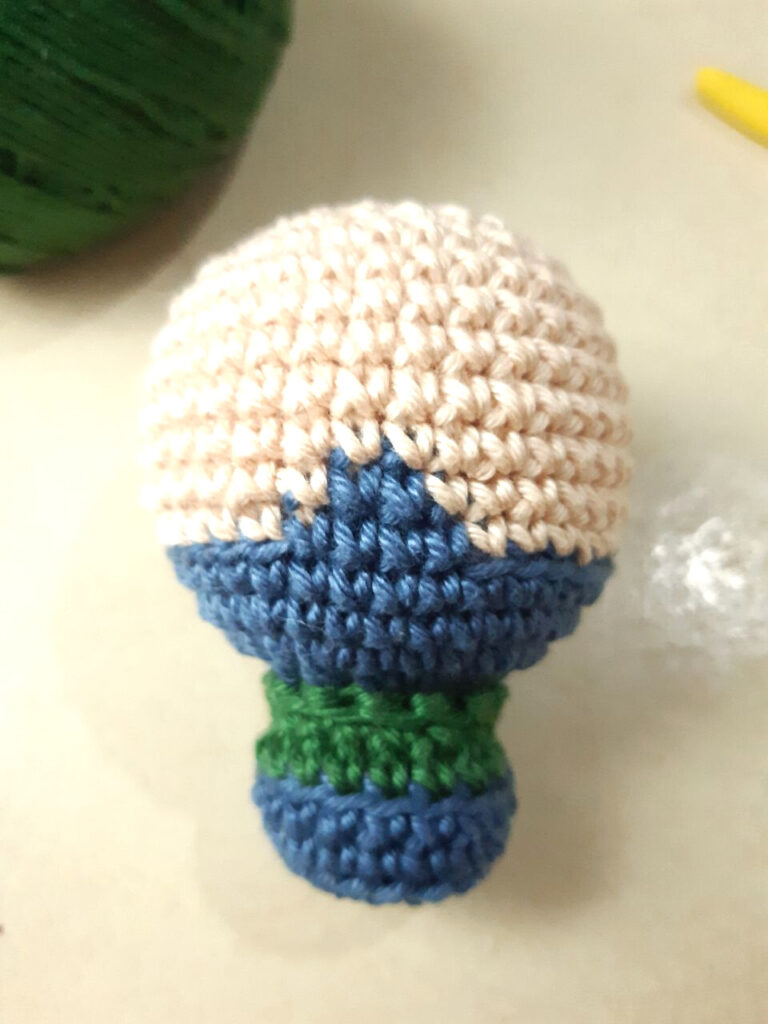
Keep the first-stitch marker in place through each colour change. The small blue section in the beige head is deliberate: four blue stitches become two on the following round, shaping the upper edge of the mask.
The green front-loop round also leaves a ring of unused loops for the new blue head section. Finding those loops correctly matters more than working quickly. The guide includes the actual construction views showing that join.
The hair is built in layers
A plain grey cap provides the base. Back-loop rounds leave free loops around it, and those loops hold the extra tufts. The longer strands use chains worked back towards the cap, while shorter spikes finish part of its lower edge.
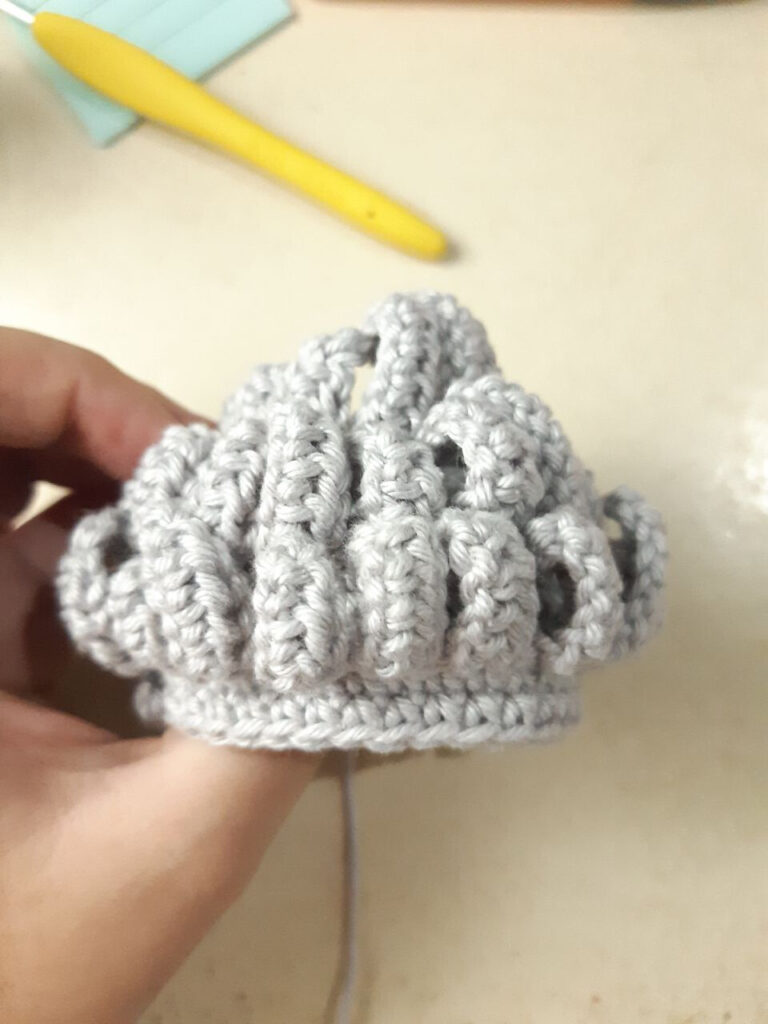
Make the layers in their stated order and check the reserved ring each time. The top ring has fewer available loops than the lower two, so the tuft counts are different. The guide explains the loop use and identifies the top-ring gap as a detail to check on a sample.
Before sewing, try the cap at the angle shown in the assembly photos. A small tilt changes how much of the face remains visible beneath the headband. Use Kakashi’s own left and right when reading the placement notes, then check the result from the front.
A tiny eye and felt headband plate
The visible eye is embroidered with black thread. It is a small closed-eye expression, which suits the scale of the face. There is no need to assume that a round plastic eye belongs in that spot simply because eye fittings appear in the material list.

The felt plate carries a small leaf emblem. The embroidery sequence shows the shape building through short backstitches, and a separate graphic gives you an outline to compare. Size the plate to your actual headband rather than treating the graphic as a calibrated print template.
There is a stitch-count conflict in the printed headband: its listed groups total 61 stitches, but the starting chain allows 60 working positions. The English guide keeps the listed groups and proposes a 62-chain start. That correction has not been physically tested, so check the wrap on your cap before adding the felt.
Materials to gather
- Compatible smooth yarn in blue, green, beige and grey.
- A 2.5 mm starting hook, adjusted after checking the actual fabric.
- Stuffing, black embroidery thread and a small piece of white felt.
- Stitch markers, scissors, a blunt yarn needle and an embroidery needle.
The original sample uses Círculo Amigurumi yarn, but the instructions do not give numerical gauge or measured quantities. Make a small stuffed test to check the fabric, and use compatible yarns across the colours so the hair cap, head and accessories work together.
Fill the small core gradually. Overstuffing can open the stitches or distort the mask; too little support can make the head sit poorly. Baste the limbs and hair in place before tightening the seams.
Where this project fits
Mini Kakashi belongs in an anime or character-amigurumi collection. It could make a small handmade display gift for someone who enjoys Naruto. Keep its tiny felt piece, thread ends and tied accessories out of reach of real pets and anyone likely to mouth them.
The figure is a decorative make, with no new wash, seam or small-part testing behind the guide clarifications. Follow the actual materials’ care labels and try the cleaning method on samples first.
Questions before you start
Is this a Naruto Uzumaki doll?
The character in this guide is Kakashi. Naruto is the series context. The other dolls visible in the background of the original cover are not additional included patterns.
Does the free PDF include the hair and headband?
Yes. It includes the complete doll route, limbs, hair-cap base and tuft layers, headband, embroidery and assembly. The original Portuguese pages and making photos are retained after the English guide.
Are the photos actual making stages?
Yes. The supplied material includes body-loop, hair and embroidery construction photos. They are distinguished from the finished views and emblem graphic; no new process photos have been invented.
Can I make it without sewing?
The design uses attached limbs, a separate hair cap and a felt plate. It is not a no-sew construction.
Have the English guide’s corrections been tested?
No new physical sample has been made. The headband foundation repair, top hair-layer placement and added finishing explanations are marked as draft details to check in yarn.
Start with the body and head, then take your time with the hair. Keeping those reserved loops visible gives the later layers a clear place to go.


