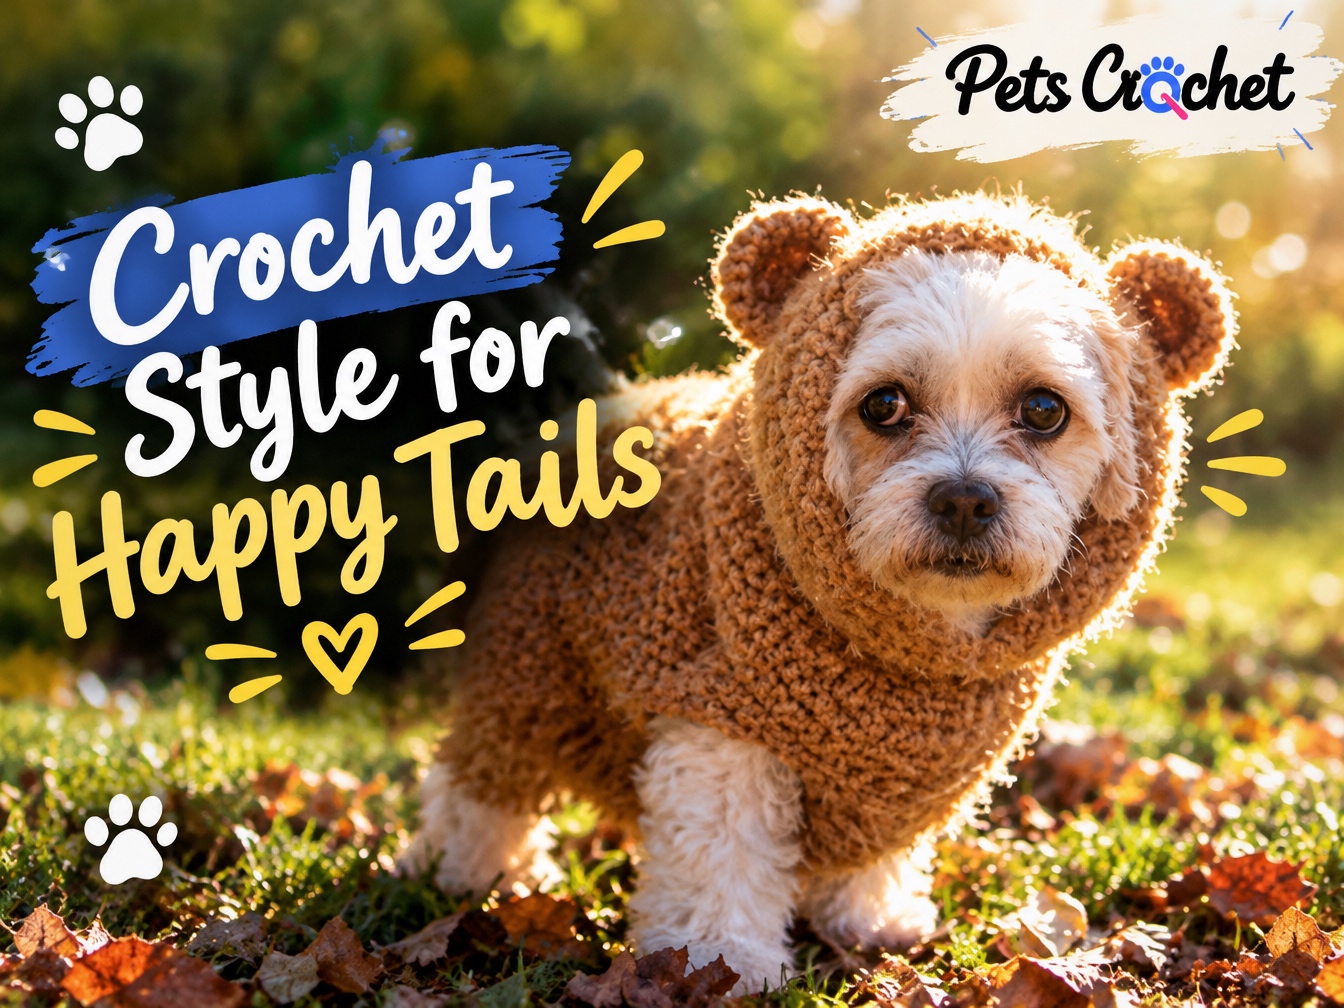
The shaggy brown fabric is what gives this crochet dog costume its bear-like look. A hood frames the face, two rounded ears sit above it, and the body carries the same fuzzy texture. Under all that fluff, Scare Bear is built mainly from single crochet.
The texture comes from holding bulky yarn and eyelash yarn together. That makes the stitch choice straightforward, but it also makes counting more demanding. This is an intermediate project with shaping, leg openings and a hood to plan, rather than a quick accessory to make without measuring.
1. Scare Bear: A Hooded Crochet Dog Costume
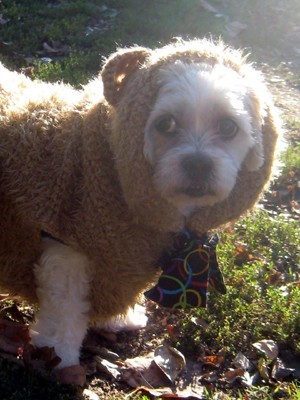
The ears do not need stuffing, and the furry-looking surface comes from the yarn rather than a separate trim. The body begins at the neck, widens across the chest and separates into three strips. Chains reconnect those strips below the leg openings before the back is shaped.
The hood is picked up from the original foundation edge. It is worked as a shaped panel and folded back around the face; it does not have an added closed top seam. That detail matters when you reach the assembly stage, because a tightly closed hood would change the design and the opening.
One costume, with seven size references
The guide includes the XS to XXXL measurement chart, the complete making route and a count table you can follow one size at a time. These are seven references within one pattern. Actual gauge and fit still need checking.
The yarn combination makes the difference
Use one strand of category 5 bulky yarn and one strand of category 5 bulky eyelash yarn together through the main fabric. Treat the pair as one strand on the hook. The solid yarn helps define the fabric while the eyelash strand gives it the shaggy finish.
The starting hook is 6 mm, with a target gauge of 12 single crochet stitches and 14 rows over 4 inches. Swatch with both yarns together. A swatch made in the solid yarn alone will not tell you how the finished combination behaves.
The listed yarn amounts run from 350 to 1,350 yards of each yarn, depending on the chosen size. That distinction is easy to miss when shopping: the allowance is for two separate yarn supplies, not one combined total. Fibre and brand are not specified, so check both labels before choosing how to clean the fabric.
Measure before choosing a size
Measure the neck, the widest part of the chest and the length from the collar position to the base of the tail. Check head passage and front-leg spacing too. A dog can fall into different columns for different measurements; choosing by breed or weight alone will not resolve that.
| Size reference | Dog length | Dog chest | Dog neck |
|---|---|---|---|
| XS | 5-8 in | Up to 10 in | Up to 7 in |
| S | 8-11 in | 10-15 in | 7-10 in |
| M | 11-14 in | 15-20 in | 10-13 in |
| L | 14-17 in | 20-25 in | 13-16 in |
| XL | 17-20 in | 25-30 in | 16-19 in |
| XXL | 20-23 in | 30-35 in | 19-22 in |
| XXXL | 23-26 in | 35-40 in | 21-25 in |
These are dog-measurement ranges, not newly verified finished-garment dimensions. The written row counts also need comparing with the actual back length. Make a measured template or fitting sample before committing to the final eyelash fabric, especially if the measurements do not sit comfortably within one column.
Three places to slow down
Keep the real stitch tops visible
Eyelash yarn can hide the loops you need to work into. Mark the first and last real stitch of a row and count regularly. If the fluffy fibres obscure the edge, pause and find the stitch instead of guessing and adding width.
Check both leg openings together
The three strips must have the same number of rows before they are rejoined. The gaps between them become the openings. Check their position, size and symmetry before continuing the body, while it is still practical to undo a small section.
Plan the hood fold off the dog
The fold has no universal depth. Start on a form or template, keep the face and ears clear, and do all pinning and sewing with the garment off the dog. The ribbon shown in the photo is decorative; the guide’s proposed working finish leaves that loose neck bow off.
Comfort comes before the costume
Decorative clothing has no benefit for many dogs. If your dog does not need or welcome clothing, make Scare Bear as a display or garment-form project. Do not force a dog into fancy dress or use the costume to hold a pose.
If checking a garment that the dog already tolerates, keep the fitting brief and directly supervised. The face, hearing, breathing, movement and toileting must remain clear. Remove it immediately for discomfort, chewing, heat or restricted movement. Take it off for sleep, crating, rough play or time alone.
Keep the functioning collar or harness accessible. The crochet is not a place to attach a lead, and a decorative hood does not establish weather protection.
Questions before you start
Is Scare Bear suitable for a beginner?
The pattern is intermediate. Single crochet does most of the work, but counting through eyelash yarn, keeping the three strips aligned and shaping the hood call for more experience than a plain rectangle.
Does the free PDF include the whole pattern?
Yes. It includes materials, the size references, gauge, complete construction, a drawn opening-layout aid, finishing notes and the unchanged reference pages.
Can I substitute a smooth yarn for the eyelash yarn?
That would change the surface shown in the photo and could change the gauge and drape. Treat it as a separate sample, swatch the actual combination and recheck the full construction. It is not an independently tested variation.
Have the clarified counts been physically tested?
No. The guide identifies the M centre-strip correction and the XS back-count decision, along with the assembly interpretations. Those editorial changes need a physical crochet and fit check before treating them as verified.
Can I use the same guide for a cat?
The measurements and construction are for dogs. They do not establish a cat version. Keep this project in the dog-clothing collection rather than assuming the hood or openings will transfer.
Start with the two-strand swatch and your measurement notes. Getting those right gives you a much better basis for deciding whether this is the project to make next.